


I’ll be sincere, rebuilding the wheels on our 1975 Honda CB550F was a job I hoped to place off loads longer. The method of lacing and truing wheels is tedious, and there are many alternatives to scratch a recent rim whenever you pull the tire irons out. Contemplating a shoestring finances is the cornerstone of our everyman CB550 tracker construct, and our inventory wheels are fully roached, I’ll be DIYing this entire course of in your schooling and commentary. Buckle up, as a result of we’ve some critical floor to cowl.
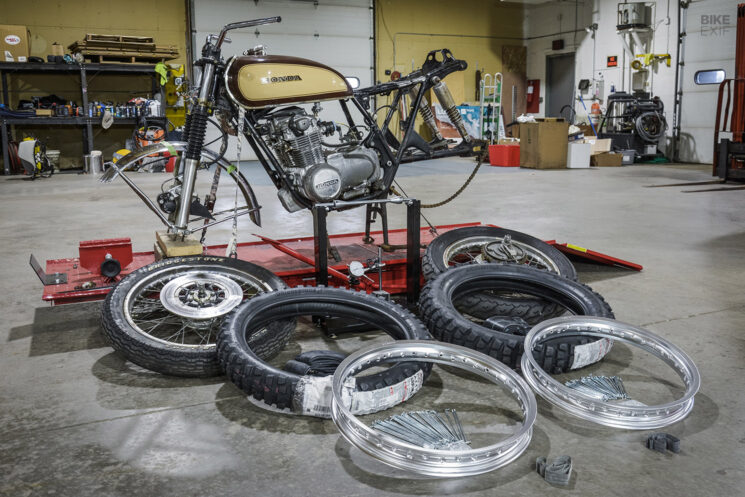
In Half 3 of our Honda CB550 tracker construct, we began getting a few of our main visible modifications mocked up, however there was no seeing previous our trashed wheels. Moreover, we actually wanted our gnarly Bridgestone BATTLAX AX41 tires mounted to visualise the remainder of the mission.
We’re solely salvaging the inventory hubs, so we ordered a primary wheel rebuild package with aluminum rims and zinc-plated spokes and nipples for proper round $170. Meaning the one disassembly concerned is taking an angle grinder to the unique spokes to liberate the hubs. I used a brass wire wheel on an air device to take away the corrosion and the previous Honda clear coat, and buffed the hubs to a mediocre end with a sharpening wheel.
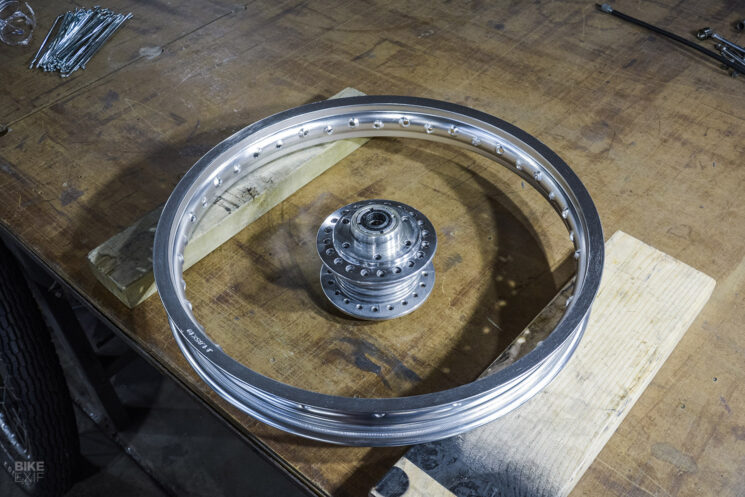
Lacing Motorbike Wheels I haven’t constructed sufficient wheels to think about myself professional, and even superior for that matter, however it’s not all that sophisticated when you take your time and do your homework. Earlier than you chop up your previous wheels, take a number of measurements to find out if the hubs are offset to at least one facet, and a few photographs will assist set up reference factors for lacing spokes.
Lacing our Honda CB550F wheels begins with our internal spokes (the spokes with lower than a 90-degree bend) and the valve stem gap as our start line. We recognized its corresponding gap within the hub earlier than we began, however there’s loads of data on the net when you’re ranging from scratch. Utilizing our entrance wheel for example, you may see the bench rule types a tangent line from our first gap within the rim to its gap within the hub.
From there, notice the sample of holes within the hub and rim (skip one gap within the hub and three within the rim for our entrance wheel), and the internal spokes fall into place. Thread every nipple on only a few turns to maintain every thing unfastened, and also you’ll wish to use some type of lube on the spoke threads so that they tighten up persistently with out galling.
Subsequent, we flipped the wheel and used the identical sample for the internal spokes on the opposite facet, however lacing in the other way so the internal spokes cross one another. With internal spokes performed, the outer spokes are put in from the other facet of the hub and also you’ll be capable of inform proper the place they go. Our outer spokes lace the other way of the inners, and the spokes cross 3 times on our entrance wheel, and two instances on the rear wheel.
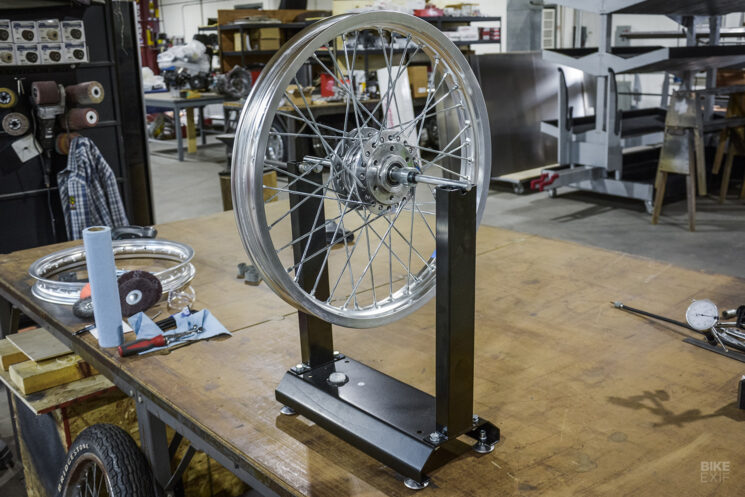
Truing Motorbike Wheels We’ve got each wheels loosely assembled at this level, and it’s time to make them tight and true. A truing stand simplifies this course of an excellent deal, and ours is nothing greater than a finances unit from Harbor Freight. It will get the job performed, however (hilariously) doesn’t include a pointer, so we’ll use a dial indicator on a magnetic base with out being too choosy concerning the precise measured values. In case you’re actually balling on a finances, you may true your wheels on the bike utilizing your axle as a fixture and a cable tie or another piece of scrap as a pointer.
Along with your wheel within the fixture of your selecting, it’s time to start out tightening up the nipples, however take it sluggish. Working the nipples down slowly and EVENLY will make the true enterprise of truing the wheel loads simpler, and the wheel will begin to take form whenever you’re right down to the final couple of threads.
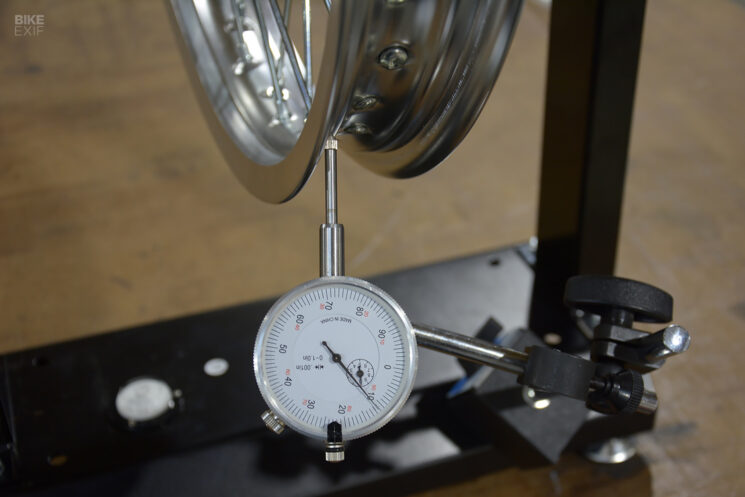
Because the spokes begin seating within the rim, we will escape our pointer and begin fine-tuning the wheel. I like to start out with wheel hop, or up and down variance, to make sure we’re not too far out of whack proper off the bat. Tighten a collection of internal and outer spokes to deliver the rim up (nearer to the hub), and chances are you’ll must loosen some on the other facet to get issues into form. Addressing runout, or side-to-side variance, is finished in a similar way, besides you’ll tighten or loosen spokes on one facet of the wheel to shift it proper or left.
I went forwards and backwards with our CB550 wheels, checking the hop and runout, and making small changes of 1 / 4 flip at a time. It’s useful to make some reference marks with tape that will help you preserve observe of your downside areas. The larger the part that’s out of whack, the extra spokes you’ll have to regulate, however you’re at all times working a number of spokes to appropriate a piece.
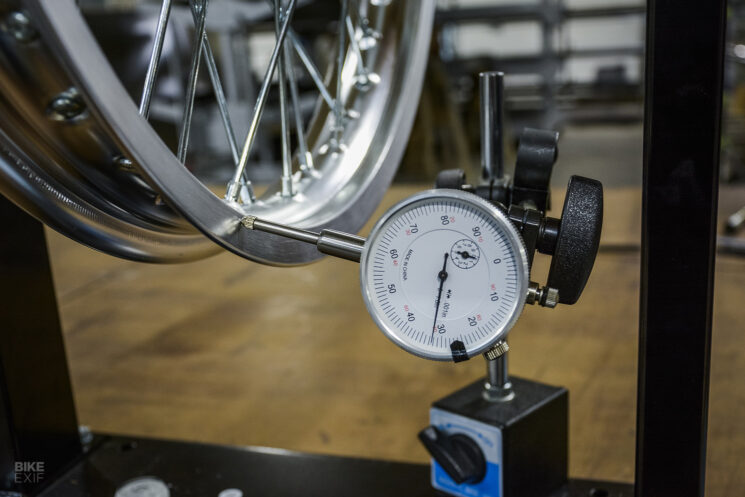
As soon as the wheel is straightened out (and any hub offset accounted for), you wish to make certain your spokes are tight, however not too tight—as you’ll gall up the threads on the spoke when you go too far. There’s a specified torque in your spokes, however until you’ve got an adaptor and an inch-pound wrench, you’ll most likely use the audible torque spec technique. Knock an 8 mm wrench towards every spoke and hear for a pleasant ‘ping’ sound. A unfastened spoke will give a boring tone.
Perfection is the enemy of the great, as I spent approach an excessive amount of time straightening out our cheapo aluminum hoops. You’ll at all times have a hiccup in your measurements on the seam the place the wheel is welded collectively, and keep in mind to decorate any spokes protruding by way of the nipples earlier than putting in your rim strips.
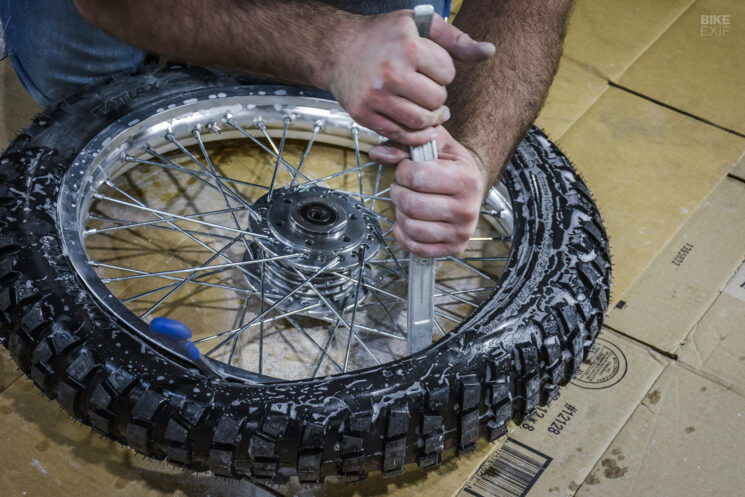
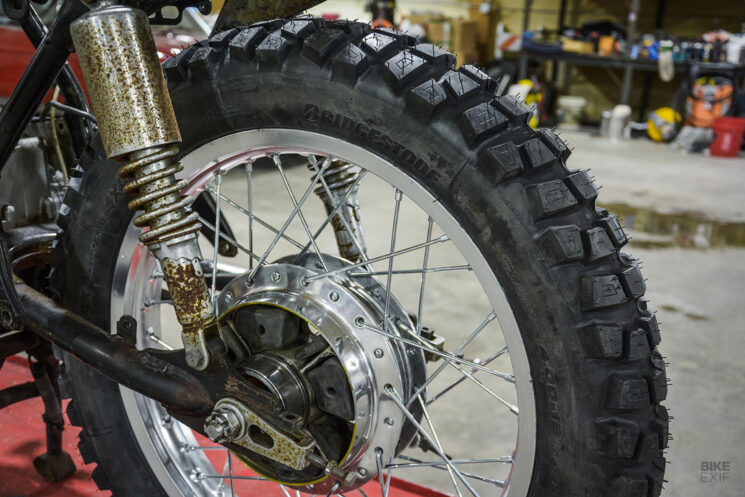
Mounting Motorbike Tires We’ve come a protracted option to get our CB on some new rubber, and when you’re nonetheless with me, I promise I’ll preserve this transient to get us over the end line. We’ve been teasing that we’ve some gnarly meats for our tracker mission from the get-go, and it’s lastly time to put in our new BATTLAX ADVENTURECROSS AX41 tires from our pals at Bridgestone. They’re beefy and rad sufficient to ruffle some feathers, however we additionally appreciated the combination of DOT avenue and off-road efficiency the tire presents, and we have been stoked to search out sizing choices that might work on our previous CB550F.
In case you experience bikes, you’ve most likely modified a tire (or a minimum of perceive the method), so I received’t beat this one into the bottom. Line up the balancing mark in your tire (if it has one) together with your valve stem and work the primary bead over. Soapy water and child powder are your mates right here. Then set up the tube and work your second bead on together with your trusty tire irons, ensuring to not pinch the tube within the course of.
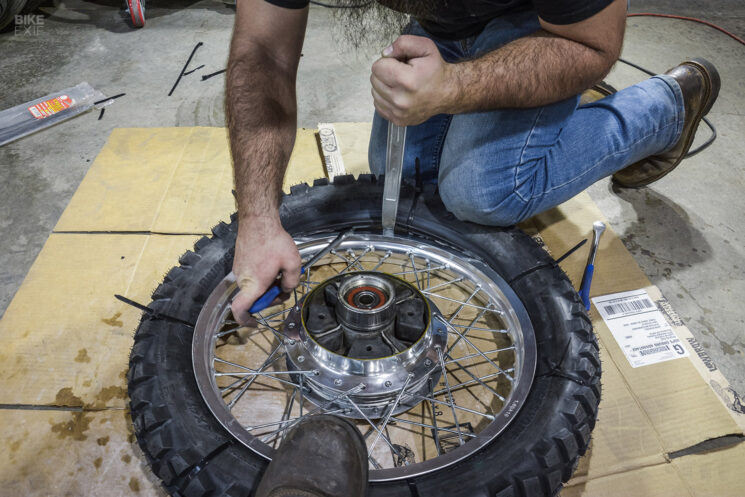
We mounted our entrance tire by the ebook, however I did it a second time to indicate a trick utilizing cable ties (as a result of I clearly wouldn’t mount the tire backward and must redo it). With this hack, you put in the tube into the tire after which use a number of cable ties to squish each beads collectively. Basically, you solely must work the bead over the rim as soon as with this strategy, earlier than reducing and pulling the cable ties.
Postscript Ending that mission, and condensing it for this website, requires a deep breath and a chilly drink. It’s not all that troublesome when you’re headstrong and useful, and definitely value it when you can take pleasure in a pair easy items of aluminum like I can. For the small measurement of our funding, the transformation is big, although I nonetheless must redo the brakes and polish a number of extra items.
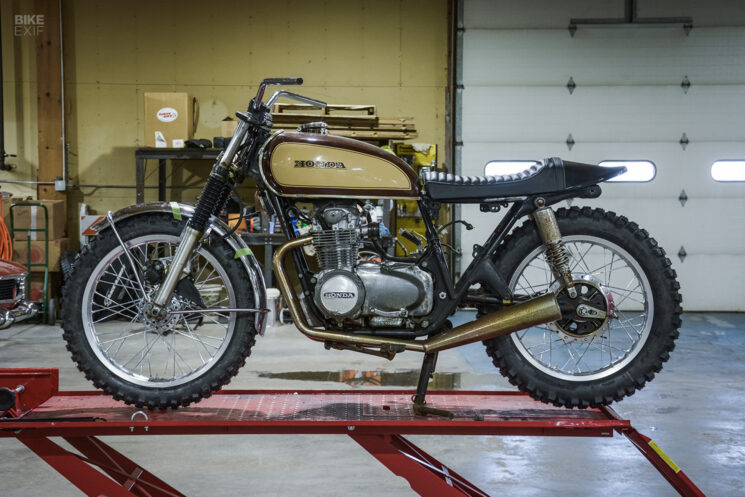
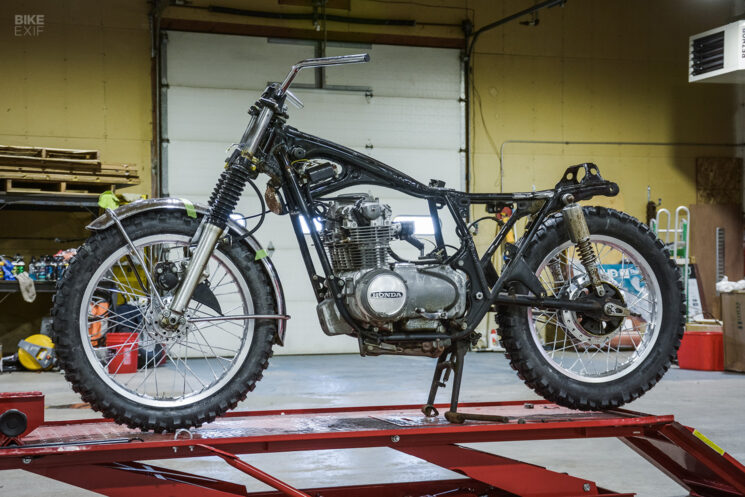
With our new wheels and tires on the bike, I can lastly see every thing coming collectively and fine-tune the visible weight of our Honda CB tracker. It’s PLAINLY apparent the entrance fender doesn’t work as is, and I’ll do some mock-ups with the fender shortened, raised to the decrease tree and eliminated fully, however we’ll save that for an additional day.
Even with a contemporary tread design, I’m stoked on the tires. The bike appears to be like timeless and rugged with somewhat early ’60s dust bike affect, and I can’t wait to hoon this factor round when it’s completed—that’s what it’s all about proper? I might ramble on, however there’s work to do. Time to tidy up our body extra and set up some suspension to match these meats. Keep tuned.
Bike EXIF thanks Motogadget, Tuffside, Bridgestone, Lowbrow Customs and Biltwell Inc. for supporting our Honda CB550F tracker construct.


